
Photography is the study of light. It’s always an adventure and no two moments will ever look the exact same. The natural progression from on camera flash will lead you to working with off camera flash. Here’s our guide for getting started.
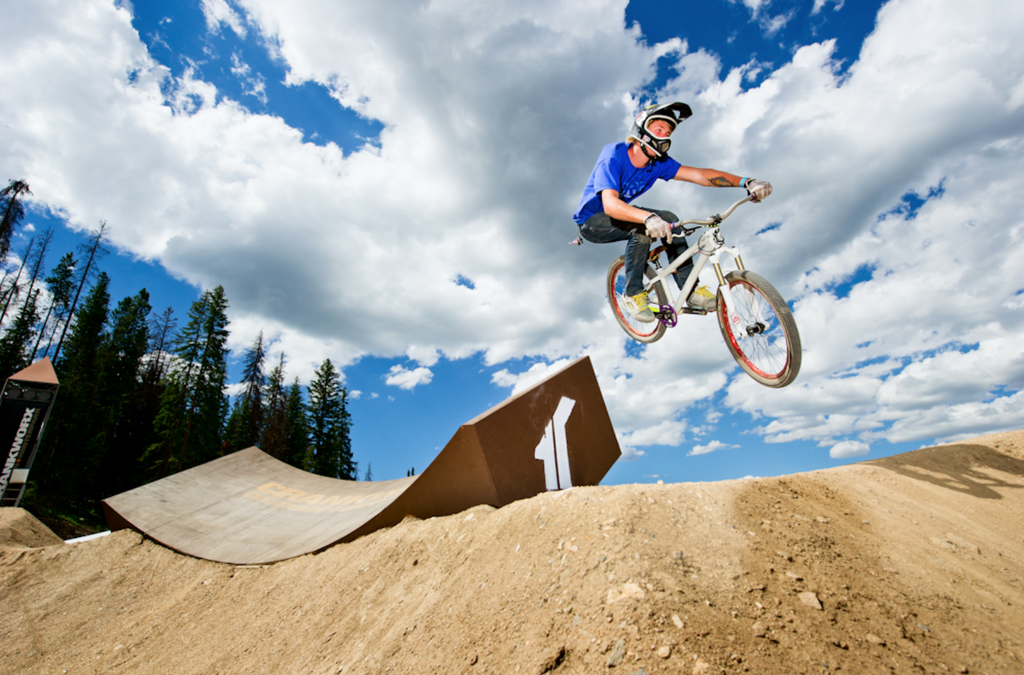
Image captured by Connor Walberg
Why you should start shooting with an OCF (Off-camera flash)
Light direction plays a huge part in quality. At LumiQuest we make products that will soften and color the light, but this is only a part of the equation. The other key component is direction of light.
On-camera flash has one direction, straight forwards (unless bounced). If you think about the way the sun casts shadows it’s easy to see that light coming from different directions changes the way things look because of these shadows.
When you fire an on-camera flash it often creates a deer in the headlights look. It’s very flat and almost appears 2D since there is no sense of depth.
Bring that same flash off to the side just a little, and suddenly the subject starts to look like a part of our 3D world. The light wraps around a little and there’s fall-off and shadows on the opposing side.
This extra depth creates a far more dynamic image, and is definitely going to give you a professional advantage over photographers with just an on-camera flash.
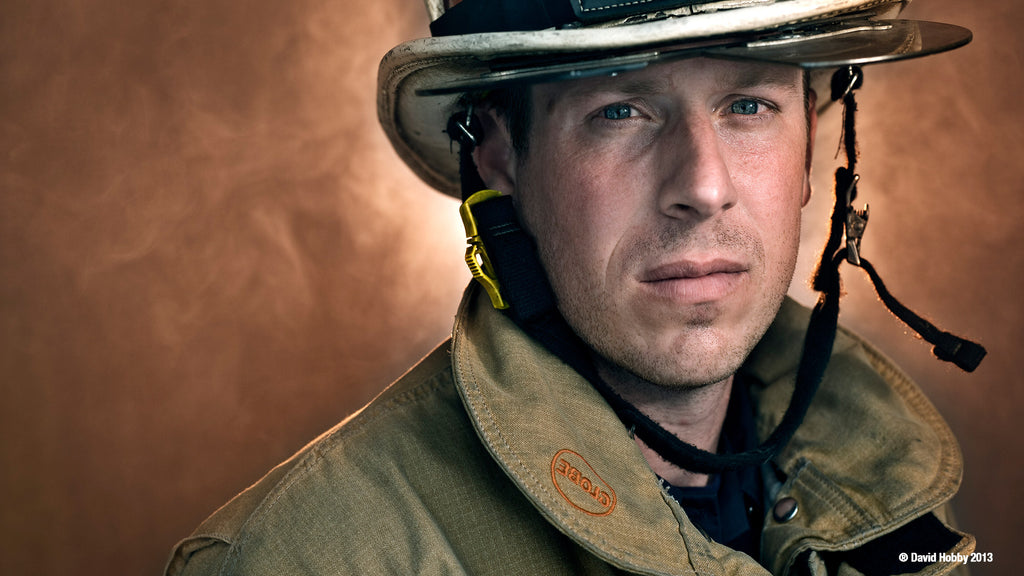
Image captured by David Hobby
Shooting one off-camera flash
When you shoot one flash off-camera, it’s easier to get very even lighting by keeping that flash closer to the camera. For a more dramatic look you can move it more to the side of the subject.
Playing around with placement you’ll start to see what works, and most importantly, what doesn’t. Certain angles will cast bad shadows that you don’t want to see in any photo… Move the flash up and down as well depending on how your shadows are cast.
This is where a soft box can make a HUGE difference in the way the light works. The bigger the soft box and the closer to the subject you place it, the softer the light will be. This is because it wraps around the subject more evenly instead of being such a strong small source.
Before you even turn a flash on, dial in your exposure and make the shot look it’s best without flash. It’s always easier to start with a perfect exposure and then add on.
Working with multiple remote flashes
This is where the add-on method is best used. Most photographers get this all wrong and set it all up right away. Start with the ambient shot and get it dialed.
Once that’s looking great, bring on the first flash. Remember that all flashes will work against each other or combine in some way. Get this first one placed exactly where you like and make it look great.
Then it’s time to bring on more power. Take your next flash and mix it in. Because you are happy with how the first flash looks and the ambient, you’ll know that anything that’s looking bad is caused by the new flash. Keep adjusting until it’s just right.
Since the flashes play off eachother, sometimes you will need to go back and adjust a previous flash, but by using this build up method you will know exactly what's causing any lighting issues.
Repeat again and again until you have the full setup and are ready for the shot!
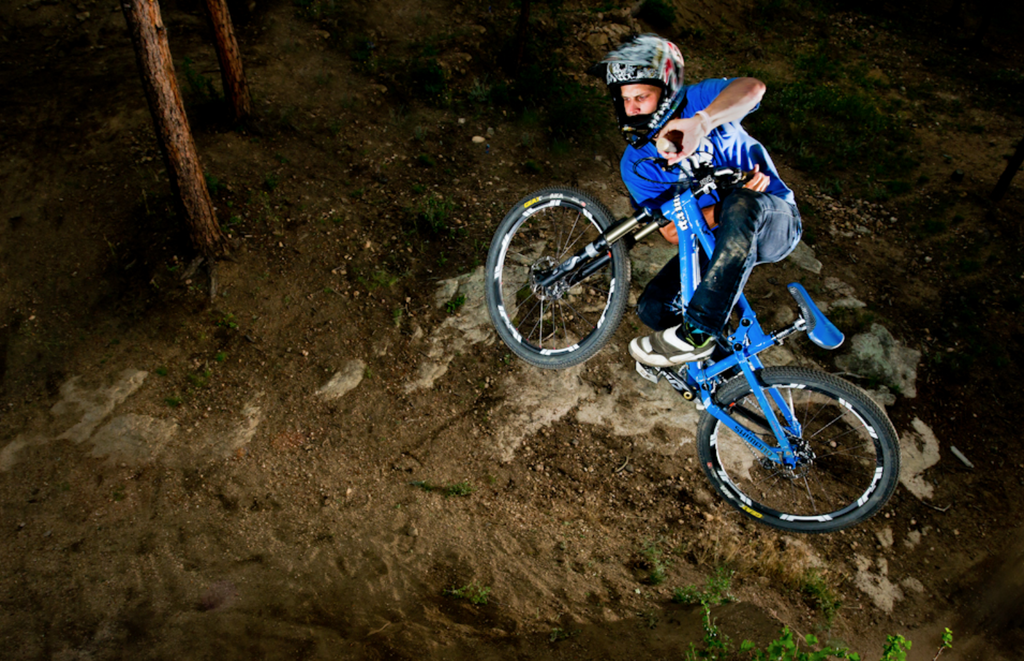
Image Captured by Connor Walberg
Mixing flash with ambient light
Wedding photographers and outdoor photographers will use this technique for almost every shot. This creates spectacular results that takes your photos to the next level.
Instead of overpowering the natural light sources, work with them! Natural light is what we see every day so it makes for great photos. But enhancing the natural light and not overpowering it, creates truly stunning images.
Use the sun or lights in a room to balance with the flash. Get your exposure dialed before you add flash in. The idea is to make a photo you’d be happy with before even adding flash. In this case you’ll usually use the flash as a fill-flash and the sun for bright highlights or back/side lighting.
Fill flash is exactly like it sounds. It fills in the shadows and darker areas for a more even and brighter exposure.
Remember that placement of the flash and power are the two key factors. As you keep adding flashes notice how they affect each other and cast different shadows if they are at different distances and powers.
Experimentation is the name of the game and you’ll want to test this out without being on a critical shoot. Play around with flashes and props, and bring some friends over to test too. It’s better to learn without the pressure.
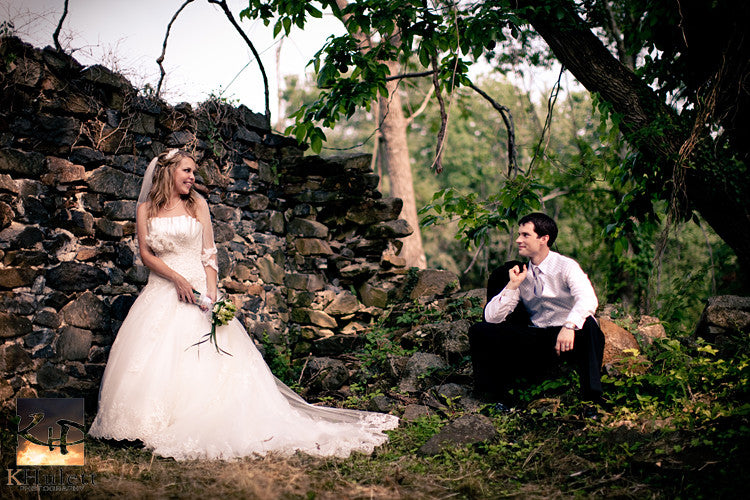
Image Captured by Kevin/Katie Hulett
Ways to get that flash off your camera!
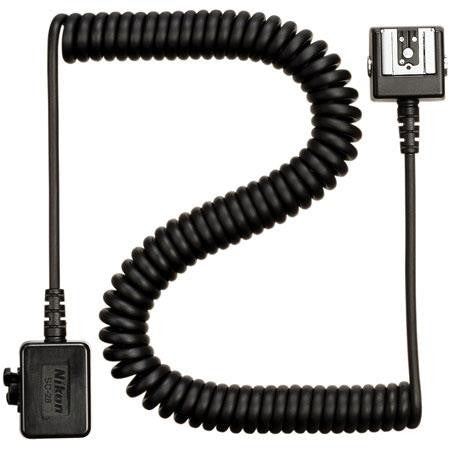
The TTL Cable:
The first and easiest method is by simply buying a TTL cable. TTL stands for Through the lens and means that the camera fires imperceptible test flashes and uses the sensor “through the lens” to determine how much power each flash should trigger with. Basically it’s a smart method for automatic flash settings so the shot comes out right every time without messing around with settings.
TTL cables are typically 3-6 feet long and are like an extension cord for your hot shoe so you can hold the camera off to the side. It’s a great way to “run and gun” without the need to move a lightstand around. Using this setup you can run a small portable soft box like the Soft Box III or a Quik Bounce, and it will still work similarly to on-camera flash.
You can also use a PC cable if your camera body has a connector to trigger the flash at a distance. These cables are cheaper than TTL and can be 50 feet or longer.
Remote Flash Mode:
For this setup you’ll likely still only need one flash to trigger. it’s often called SU-4 or Remote flash. Pop-up your built-in on-camera flash if you have one and set your hot shoe flash to the correct remote or SU-4 mode.
In this setting the on-camera flash sends an early flash towards the off camera strobe to trigger it to fire. It happens so quickly you won’t see anything. If you don’t want the light from the on-camera flash you can set it very low and it will still typically trigger the other unit. The issue here is that the off-camera flash needs to be in sight and have it’s sensor (the red part on the flash body) at an angle to receive the signal.
This is a great way to get started and experiment without buying any additional gear.
TTL Triggering / IR:
This method is very similar to remote flash but gives you TTL control. Most DSLR cameras now have this built in and it’s easy to setup. You can even set different groups so that every off camera flash (yes, you can have multiple!) will fire at different adjustments.
With TTL you can control compensation of each flash. In other words, you can say that you’d like some to fire brighter and others to have lower output. This gives you great control while your camera still keeps everything in check and consistent by through the lens evaluation.
TTL mode still requires line of sight, so make sure the red sensor on each flash can see the main trigger flash.
On some cameras you will need to purchase an additional flash head or “commander” unit to go on the camera. Most will have a built-in flash and can be setup in the cameras main menu as a commander unit.
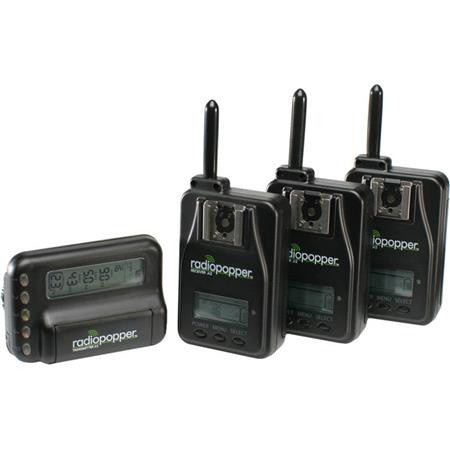
Radio Triggering:
This is one of our favorite methods and it’s now commonly built into top end strobes. If your flash doesn’t have this feature you can always check out other external radios like PocketWizards and Radio Poppers.
By using radio waves for transmitting the signals the flash doesn't need line of sight or to even be anywhere near you to fire. This makes for the most flexible system.
Radios generally can be set to different groups on the more advanced setups and you can even control many with TTL to make it easier to nail the correct exposure every time. Grouping flashes lets you set each flash or group of flashes to a different setting for maximum control.
Time to test out your new found off camera flash skills!
Now that you’re armed with knowledge and know just what to do, it’s time to experiment. Off-camera flash is a game you’ll always be learning and improving. You'll be surprised many times by what happens and wonder where you went wrong. Just start with the ambient and rebuild the image one flash at a time if that happens!
We’d love to see your favorite off-camera shots. Please post them in the LumiQuest Flickr group if you’d like to show them off, or add a link in the comments below so we can show them off too. Good luck.